I have a confession to make. I spent the better part of last spring shooting on my Canon mirrorless setup without ever stopping to confirm I had the right file format selected. Just assumed it was fine. It was not fine. A whole weekend of lifestyle content, slightly wrong, because I trusted a setting I hadn’t actually checked. That experience sent me back to basics in a way I hadn’t bothered with in years, and honestly, it was humbling in the best possible way.
That’s what drew me to this creator’s walkthrough of the Canon R6 Mark III. Watch the full tutorial on YouTube before or after reading this breakdown. The tutorial is framed as a camera basics section, and I know “camera basics” sounds like beginner territory. But I kept pausing to rethink choices I had been making on autopilot. If you’re shooting Canon mirrorless, whether you’re new to the system or you’ve been using it long enough to get sloppy, this walkthrough is worth your time.
What I’m sharing here is my own pass through the core lessons from that tutorial. These are the steps I’d walk a friend through if they handed me their R6 Mark III and asked where to start.
Step 1: Understand What Kind of Camera You’re Actually Holding
 Mirrorless camera body shown with lens attached
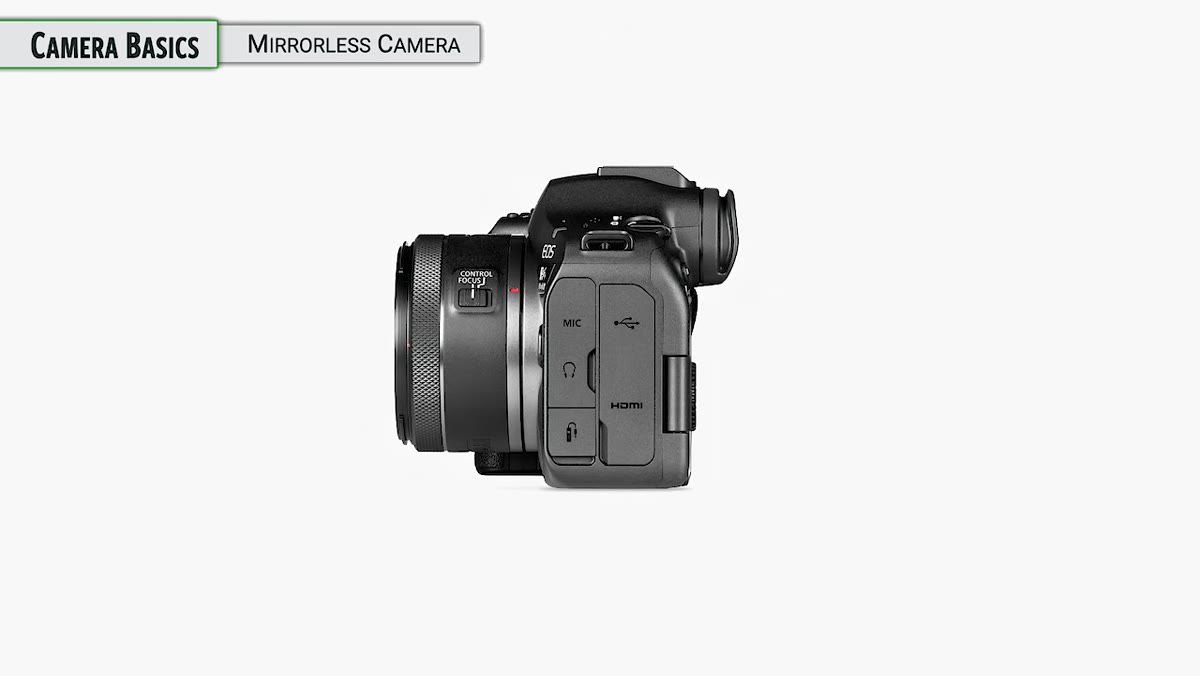
Before you touch a single menu setting, it helps to understand the machine in your hands. The R6 Mark III is a mirrorless camera, which means it uses interchangeable lenses and controls light exposure through two main mechanisms: the aperture built into your lens, and the shutter unit inside the camera body. Most Canon RF lenses have an aperture built in. A small number don’t, but that’s the exception.
Mirrorless camera body shown with lens attached
Before you touch a single menu setting, it helps to understand the machine in your hands. The R6 Mark III is a mirrorless camera, which means it uses interchangeable lenses and controls light exposure through two main mechanisms: the aperture built into your lens, and the shutter unit inside the camera body. Most Canon RF lenses have an aperture built in. A small number don’t, but that’s the exception.
The key thing to internalize here is that in a mirrorless camera, the shutter has to stay open most of the time. That’s how the sensor feeds an image to your electronic viewfinder or LCD screen so you can compose your shot. The shutter only does its actual job, which is to precisely time and limit the light hitting the sensor, when you press the shutter button to capture a frame. Understanding this helps you make sense of almost every setting you’ll encounter later.
Step 2: Get Familiar With How the Shutter Actually Works
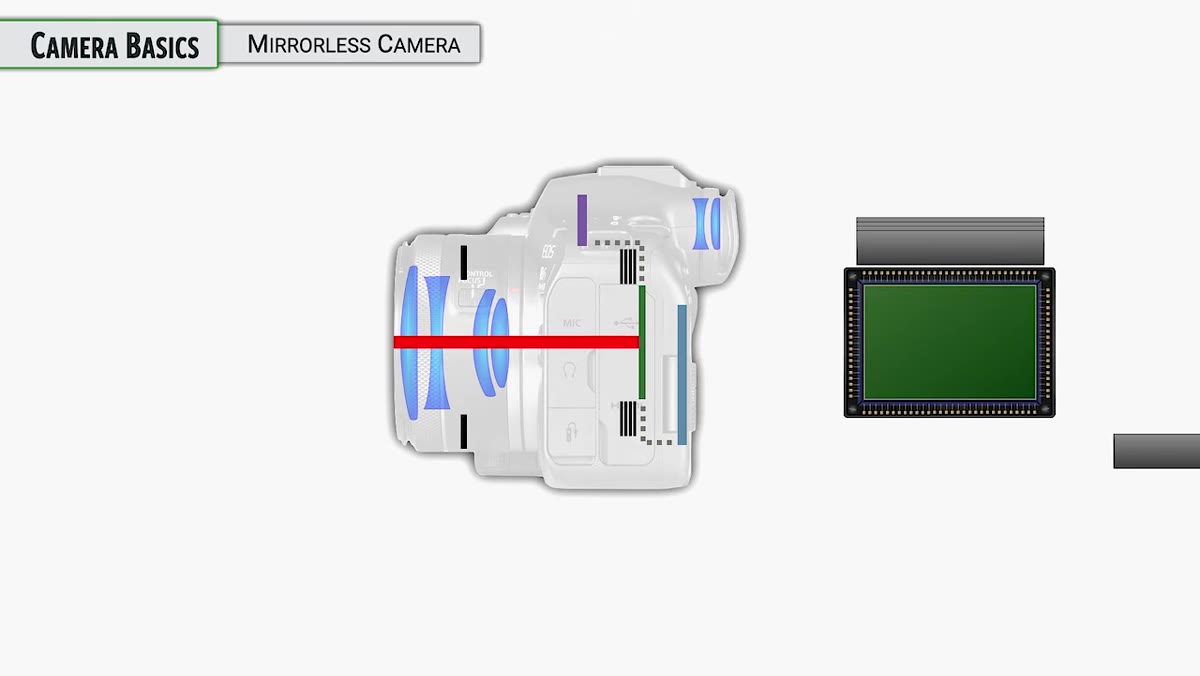 Diagram or camera cross-section showing shutter mechanism
The tutorial walks through the mechanical logic of a traditional shutter in a way that clicked for me immediately. The first shutter curtain closes, then opens to begin your exposure. The second curtain closes to end it, making sure every pixel gets exactly the same amount of light. Then the shutter opens again so you can see through the camera for your next shot.
Diagram or camera cross-section showing shutter mechanism
The tutorial walks through the mechanical logic of a traditional shutter in a way that clicked for me immediately. The first shutter curtain closes, then opens to begin your exposure. The second curtain closes to end it, making sure every pixel gets exactly the same amount of light. Then the shutter opens again so you can see through the camera for your next shot.
Here’s the important caveat: the R6 Mark III doesn’t actually default to this traditional mechanical shutter mode. The default setting is different, and there are multiple shutter modes available with real tradeoffs attached to each one. The tutorial flags this and deliberately saves the deeper shutter mode discussion for later in the course, which is the right call. For now, know that the default shutter setting on this camera is solid. Leave it alone until you understand what you’d be changing and why.
Step 3: Know Your Sensor Size and Why Full-Frame Matters
 Full-frame sensor size comparison graphic
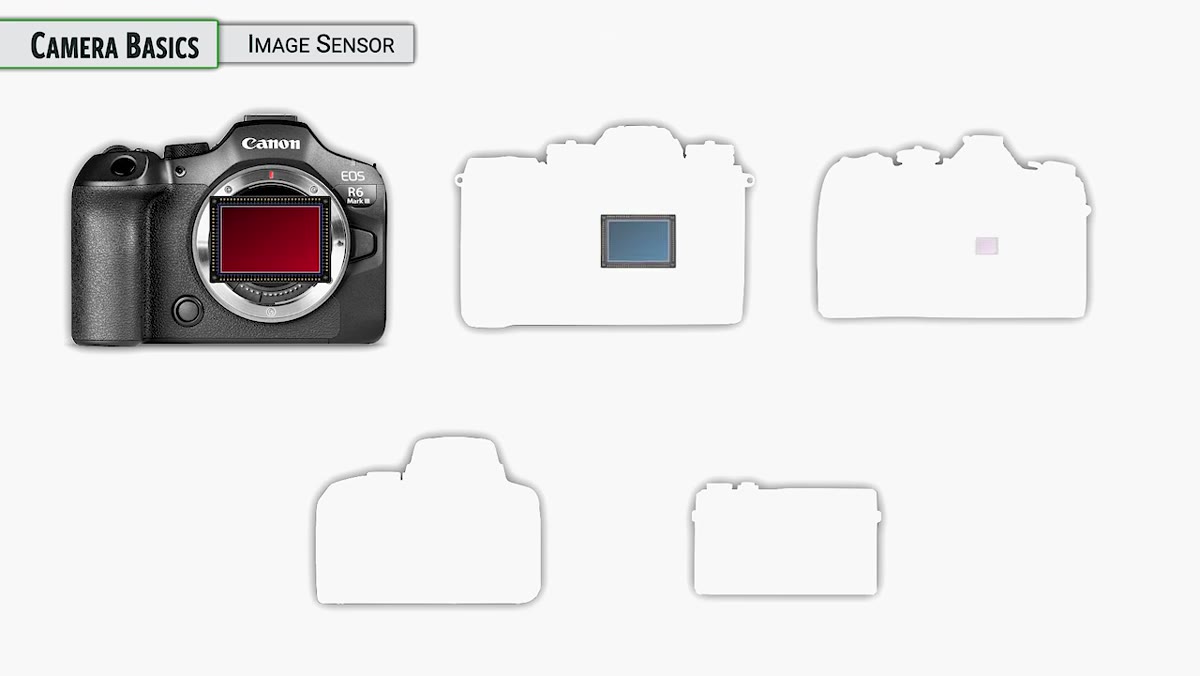
The R6 Mark III uses a full-frame sensor. That term gets thrown around constantly in photography circles, and it simply means the sensor is the same physical size as a frame of 35mm film. That standard became the reference point for camera sensors because 35mm film was so widely used. It wasn’t the largest format and wasn’t the smallest. It landed in a useful middle ground, and full-frame digital cameras inherit that legacy.
Full-frame sensor size comparison graphic
The R6 Mark III uses a full-frame sensor. That term gets thrown around constantly in photography circles, and it simply means the sensor is the same physical size as a frame of 35mm film. That standard became the reference point for camera sensors because 35mm film was so widely used. It wasn’t the largest format and wasn’t the smallest. It landed in a useful middle ground, and full-frame digital cameras inherit that legacy.
Smaller sensors, often found in entry-level cameras, have what’s called a crop factor. A 1.5x crop means the sensor is 1.5 times smaller than full-frame, which changes how your lenses behave. A 50mm lens on a crop sensor effectively acts like a 75mm lens. Full-frame eliminates that math, which is one reason professionals tend to prefer it. With the R6 Mark III, you’re getting true full-frame performance, so your lens focal lengths are exactly what they say on the barrel.
Step 4: Learn the Physical Controls Before Digging Into Menus
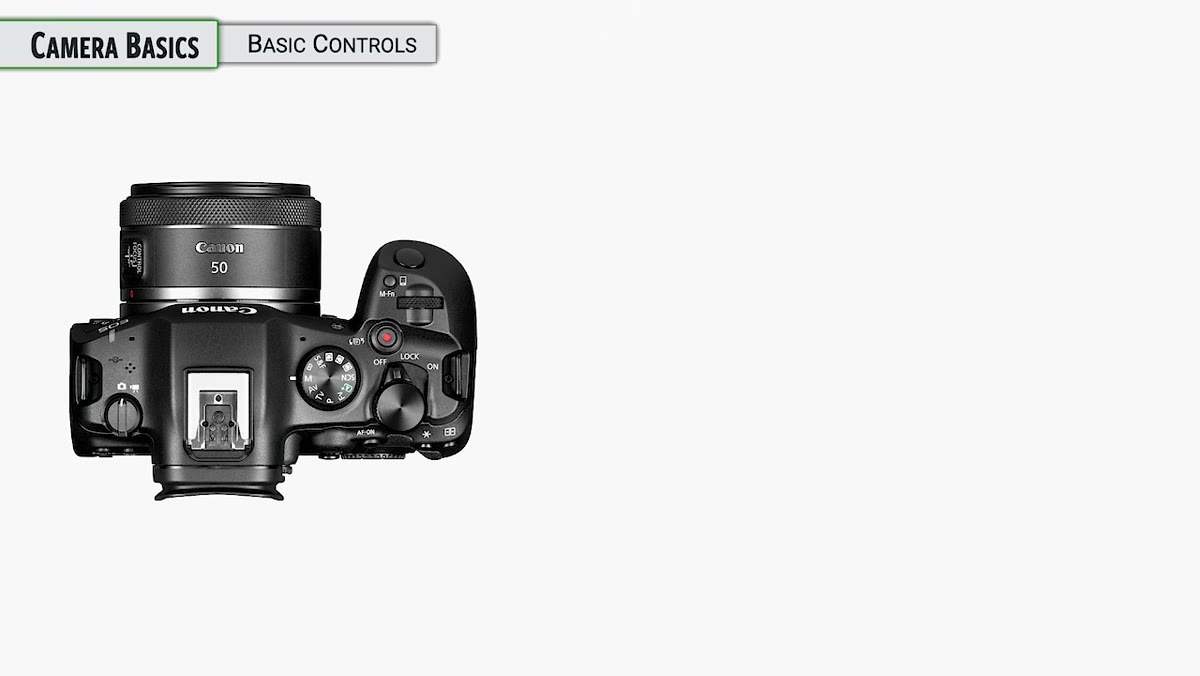 Camera top-down view showing on/off switch and lock position
The power switch on this camera has three positions: off, on, and a lock position. That lock position is easy to overlook, but it’s genuinely useful. When the camera is on but switched to lock, certain controls are disabled to prevent accidental changes while the camera is in your bag or around your neck. The tutorial notes this will be covered in more depth later, but it’s worth knowing the lock position exists from day one, because I guarantee you’ll accidentally bump a dial at some point and wonder why nothing is responding.
Camera top-down view showing on/off switch and lock position
The power switch on this camera has three positions: off, on, and a lock position. That lock position is easy to overlook, but it’s genuinely useful. When the camera is on but switched to lock, certain controls are disabled to prevent accidental changes while the camera is in your bag or around your neck. The tutorial notes this will be covered in more depth later, but it’s worth knowing the lock position exists from day one, because I guarantee you’ll accidentally bump a dial at some point and wonder why nothing is responding.
One more thing worth knowing: every time you power the camera on, it automatically runs a sensor cleaning cycle. The sensor vibrates to shake off dust particles. You can adjust this behavior in the menu, but the default is to run it on startup. You might hear a faint sound when the camera boots. That’s normal, and it’s doing exactly what it should.
Step 5: Choose Still or Movie Mode Before You Start Shooting
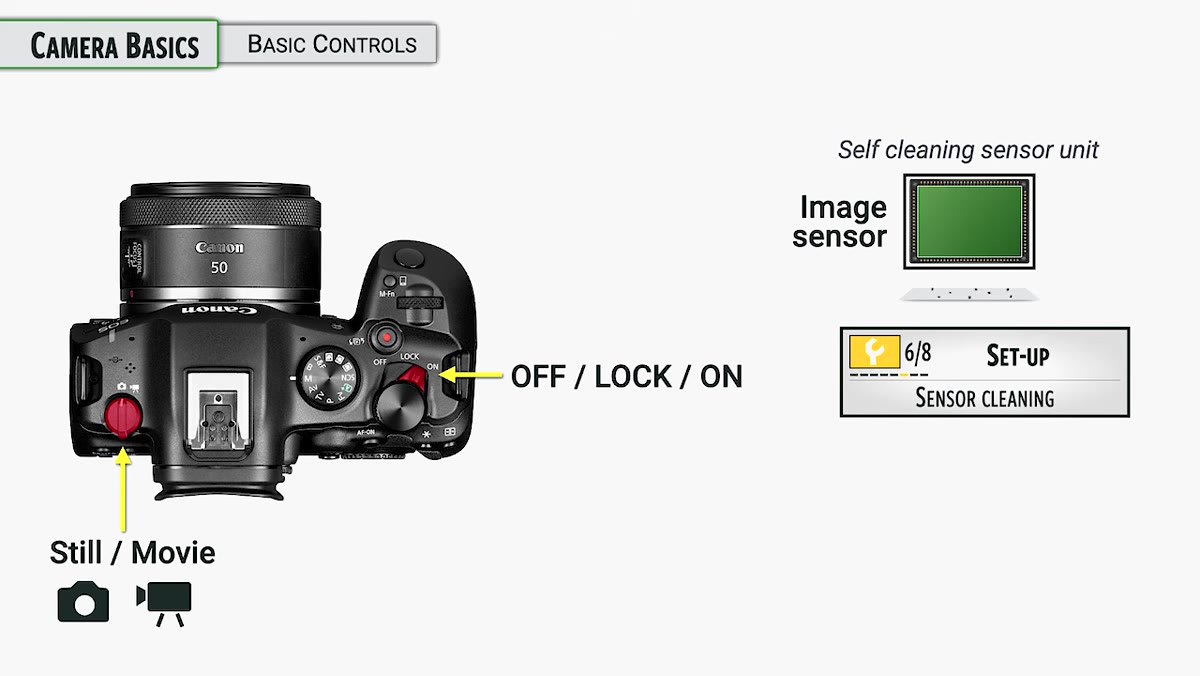 Left shoulder of camera showing still/movie mode switch
On the left shoulder of the camera there’s a physical switch that toggles between still photography mode and video mode. This is not a minor distinction. The camera operates very differently depending on which mode you’re in. Settings, controls, menu options, even the way autofocus behaves can change significantly between the two modes.
Left shoulder of camera showing still/movie mode switch
On the left shoulder of the camera there’s a physical switch that toggles between still photography mode and video mode. This is not a minor distinction. The camera operates very differently depending on which mode you’re in. Settings, controls, menu options, even the way autofocus behaves can change significantly between the two modes.
The tutorial is clear that the course focuses on stills, because the R6 Mark III is fundamentally a stills camera that also shoots video rather than the other way around. Pick your mode before you shoot. Don’t assume the camera carried over your last session’s configuration. Make it a habit to confirm this switch every time you power on, especially if you share the camera with someone else or if you were shooting video at your last session.
Step 6: Set the Right File Format From the Start
 Menu screen showing file format options
The tutorial circles back to this early on, and it’s the step I wish someone had sat me down and made me actually complete before I ever went out to shoot. Your file format choice, whether that’s JPEG, RAW, or a RAW plus JPEG combination, determines everything about what you can do with your images afterward. RAW files preserve all of the data the sensor captured. JPEGs are processed and compressed in-camera, which is convenient but limits your editing flexibility significantly.
Menu screen showing file format options
The tutorial circles back to this early on, and it’s the step I wish someone had sat me down and made me actually complete before I ever went out to shoot. Your file format choice, whether that’s JPEG, RAW, or a RAW plus JPEG combination, determines everything about what you can do with your images afterward. RAW files preserve all of the data the sensor captured. JPEGs are processed and compressed in-camera, which is convenient but limits your editing flexibility significantly.
Go into your menu and confirm this setting before your first shoot. Don’t assume it’s set to what you want. Mine wasn’t. If you’re serious about editing your work, start with RAW. If you need fast turnaround and don’t plan to edit heavily, JPEG Large Fine is a reasonable choice. Just make the choice deliberately rather than inheriting the factory default by accident.
What I’d Add From My Own Experience
The tutorial is meticulous about not rushing past foundational steps, which I appreciate deeply because I used to skip foundations constantly. My own addition to everything above: pair each of these setup steps with a physical checklist you run through before any important shoot. Not a mental checklist. An actual written or printed one.
I started keeping a small notecard in my camera bag after that disastrous weekend of wrong-format shooting. Power on, confirm mode switch, confirm file format, check battery level, check card capacity. It takes thirty seconds. It has saved me more than once, and I honestly feel a little embarrassed it took me as long as it did to start doing it.
The single most important lesson from this tutorial is also the most unsexy one: the settings you don’t check are the ones that will cost you. Understanding how your mirrorless camera actually works, from the shutter logic to the sensor size to the file format, gives you a foundation where every other technique you learn has something solid to build on. Skip the foundation and you’re just hoping things work out.
Watch the full tutorial on YouTube and follow along with your camera in hand. The basics are worth your full attention, no matter how long you’ve been shooting.
Comments (3)
Printing this out and pinning it next to my monitor. That good.
The tip about what john greengos canon r6 ma was the missing piece for me. Thank you.
Really solid breakdown. This pairs perfectly with the photoshop work I've been writing about.
Leave a Comment