
There is a specific kind of dread that sets in when you open a project folder and see 2,000 clips staring back at you. I know it well. I shoot a lot of travel content, and coming home from a two-week trip with hundreds of files across multiple shooting days is basically a guarantee that something important is going to get buried and forgotten. I’ve lost good moments that way. Not because the footage was gone, but because I couldn’t find it fast enough and eventually stopped looking.
That’s exactly the problem Peter McKinnon walks through in this tutorial, filmed during the editing phase of a large documentary project his team was working on. In this Peter McKinnon tutorial, he breaks down a marker-based logging system inside Adobe Premiere Pro that makes searching through massive amounts of footage genuinely manageable. Watch the full tutorial on YouTube if you want to follow along directly, but everything you need to implement this is right here.
The core idea is simple: instead of scrubbing through a single cluttered timeline hoping to stumble onto the right clip, you build a searchable, annotated map of your footage before you ever start cutting. It takes more time upfront, but it saves a disproportionate amount of time later, especially on projects that stretch across multiple editing sessions or involve other people on the team.
Step 1: Accept That One Timeline Cannot Hold Everything
 Overwhelming bin of 2000 clips in Premiere Pro project panel
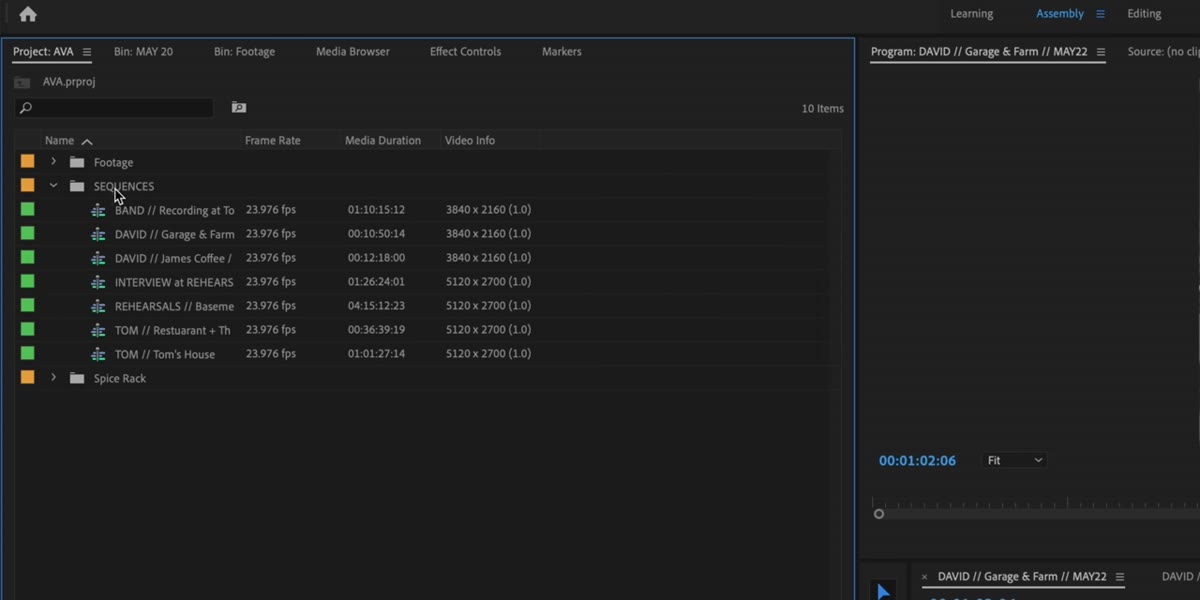
The first shift is structural. If your entire project lives on a single sequence, you’re setting yourself up for confusion. McKinnon’s approach is to break the project into multiple sequences organized by scene or location. So instead of one massive timeline where everything is stacked together, you have smaller, labeled sequences for each distinct section of the project. If you’re editing a wedding, that might mean separate sequences for the ceremony, reception, speeches, and getting-ready footage. If it’s a travel film, you might split by day or location.
In Premiere Pro, you create a new sequence by going to File, New, Sequence, or by right-clicking inside your Project panel. Name it something specific and descriptive right away. “Sequence 01” is not useful two months from now. “Day3-Beach-Sunset” is.
Step 2: Organize Your Clips Into Bins Before You Touch the Timeline
 Footage organized into labeled bins in the project panel
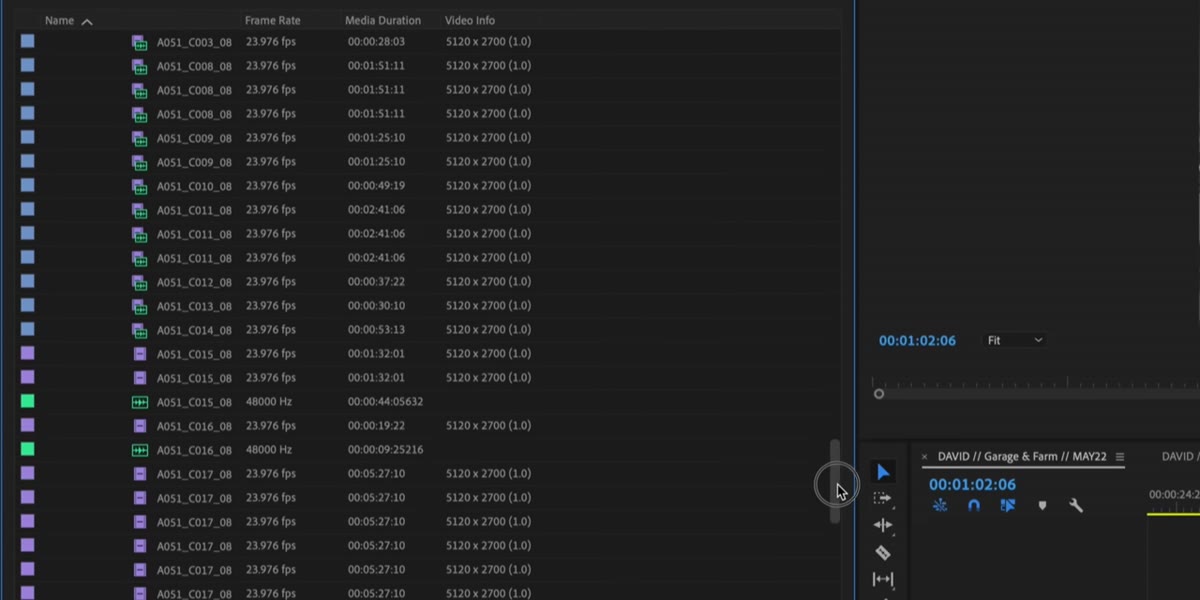
Before you drag anything to a timeline, sort your raw clips into labeled bins inside the Project panel. A bin in Premiere Pro is essentially a folder. Right-click in the Project panel and select New Bin, then name it by shoot day, location, subject, or whatever organizational logic fits your project. McKinnon’s team was working with over six hours of documentary footage, and the bin structure was what kept it from becoming completely unmanageable.
This step feels tedious when you’re eager to start cutting, but it’s the foundation everything else rests on. The goal is that when you’re looking for a specific moment, you have a reasonable guess of which bin it lives in before you even open it.
Step 3: Add Markers to Your Sequences as You Review Footage
 Colorful markers visible along the top of a Premiere Pro timeline
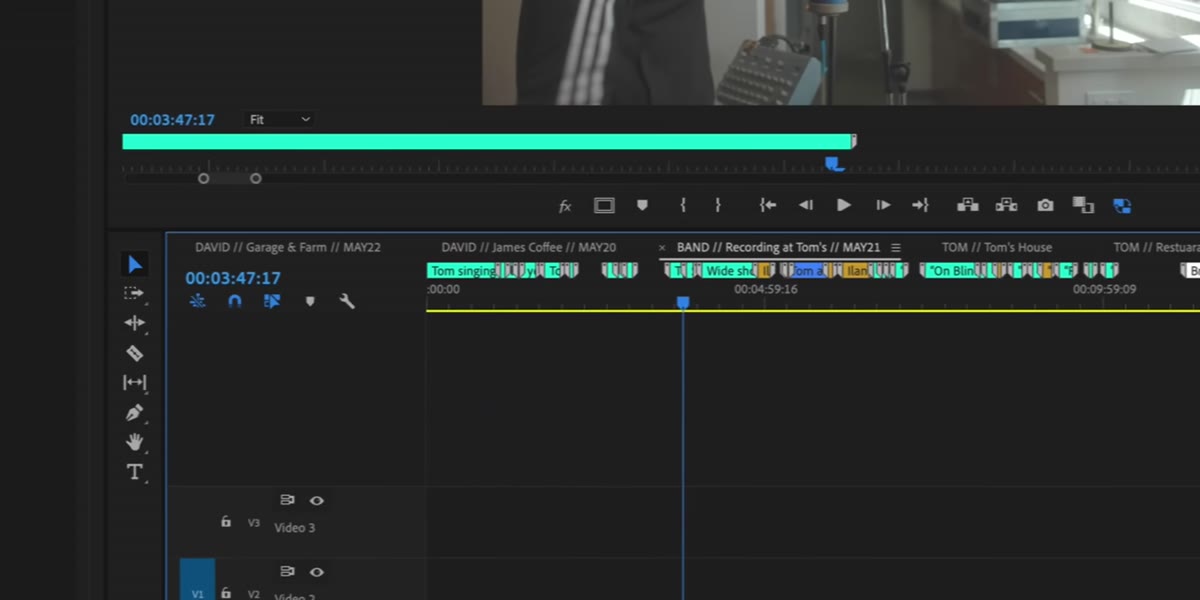
Here’s where the real power is. As you skim through your sequences, you can drop markers directly onto the timeline at any meaningful moment. In Premiere Pro, the shortcut is simply pressing M while the playhead is parked on the frame you want to mark. A colored marker will appear along the top of the timeline.
The default marker is a basic point in time, but you can double-click any marker to open a dialog box where you add a name, a comment, and even a duration if you want it to cover a range. This is where you write actual notes: who’s speaking, what they’re saying, what emotion the shot carries, whether the audio is clean. Think of it as writing searchable metadata directly into your timeline.
Step 4: Write Descriptive Keywords Into Every Marker
 Marker dialog open with typed notes and keywords visible
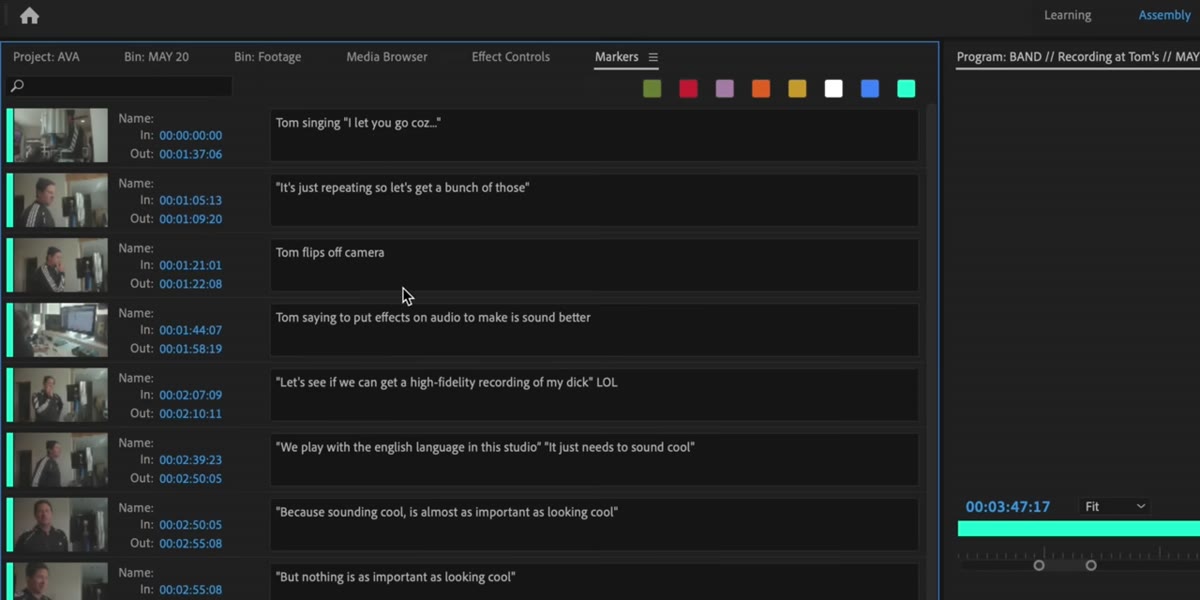
The marker is only as useful as what you write inside it. McKinnon’s team used this system to log interview conversations, essentially tagging each moment by topic so they could search for it later. The discipline here is consistency. If you type “guitar” in some markers and “music” in others for the same type of moment, your searches are going to miss things.
Decide on your keyword vocabulary before you start logging and stick to it. For a documentary, that might be names, themes, or locations. For an event film, it might be “ceremony,” “tears,” “laughter,” “first dance.” For travel content, I use a simple system: location name, subject (landscape, food, people), and one mood word. It takes about ten extra seconds per marker and pays off enormously.
Step 5: Use the Markers Panel to Search Your Entire Project
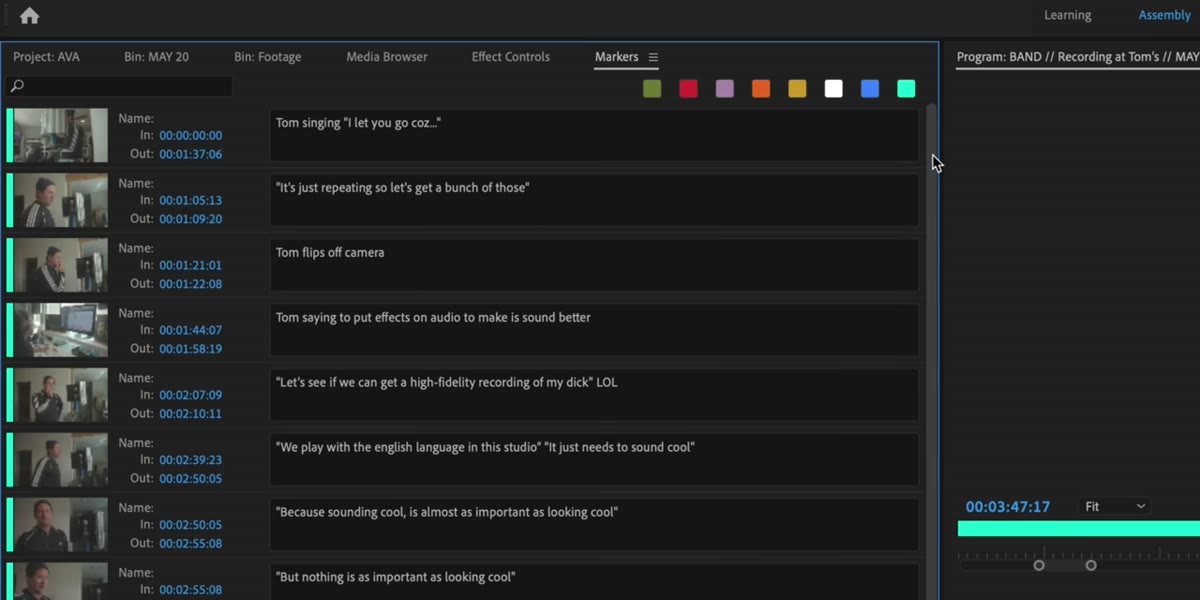 Markers panel open showing list of all logged markers with notes
Once you’ve logged your markers, go to Window and open the Markers panel. This gives you a full scrollable list of every marker across your project, with the name and any notes you wrote. The critical feature is the search bar at the top. Type any keyword and Premiere will filter the list down to only the markers that match. Click on any result and your playhead jumps directly to that moment on the timeline.
This is the part that actually changes your editing speed. Instead of scrubbing through minutes of footage hoping to find the shot where someone says something specific, you type the topic and go straight there. For a 2,000-clip documentary project, that’s not a small thing.
A Note From My Own Workflow: Start Logging on Location, Not Back Home
I started applying this system to my travel shoots, and the biggest improvement I made was shifting when I do the logging. Instead of waiting until I’m back home with all the footage loaded, I do a quick review pass on my laptop every evening during a trip. The moments are fresh, my notes are more specific, and I catch things I’d definitely forget after two weeks of traveling.
If you shoot on a phone or a mirrorless camera that lets you review clips in the field, even a rough voice memo with timestamps works as a placeholder until you can get into Premiere. The goal is to capture context while it’s still alive in your memory, not reconstruct it weeks later from footage alone.
The single most important takeaway from this tutorial is that your editing speed is largely determined by decisions you make before you open a timeline. Logging, markers, and sequence organization aren’t glamorous, but they’re what separate a stressful edit from a smooth one. If you’ve got a big project coming up, build the system before you start cutting.
Watch the full tutorial on YouTube to see Peter walk through the entire marker workflow live inside his actual documentary project.
Comments
Leave a Comment